Tips & Maintenance
Do It Yourself Countertop Installation
Most people cringe and break out in hives when faced with a do it yourself countertop installation. In fact, this project can be an incredibly simple accomplishment with the right set of tools. There is not a tool more useful than the tool of knowledge and learning how to achieve a countertop installation does not have to equate to brain surgery. Kitchen countertop replacements can be completed in a day and can provide the entire room with a well-deserved makeover. The easiest way to boost the value of any home is to transform dull, lifeless countertops to a beautiful restoration.
It can be broken down into a few short steps that can help transform any kitchen from worn and trashy looking to modern and trendy. Before beginning any project, it is imperative to realize that for every type of surface material there is a different technique for installation. Here is a general guide for direction for the two most popular do it yourself countertops:
 1. Laminate Do It Yourself Countertops: When installing laminate countertops, the under layer needs to be incredibly clean and sanded. It is inherently important that all traces of paint or varnish are completely sanded and cleaned. When this step is complete, it is time to cut the laminate to the required measurements for individual countertops. At this stage, it is wise to cut a little bigger than the actual measurements for trimming later on. Roughen the surface with a coarse sanding paper to ensure the contact cement or epoxy will stick well. With a paintbrush, carefully paint on the epoxy or chosen adhesive and allow it to dry slightly as per the adhesive directions. Place the laminate sheet over the countertop that is being recovered while taking extra precaution not to allow either surface to touch. If it touches at this stage, it will be very difficult to take them apart. Once the laminate and counter is perfectly aligned, allow the two to make contact. It is now ready for pressure to be applied to allow the melding of the two surfaces. Use a roller to apply firm, steady pressure across the countertop while paying close attention to remove any air bubbles or ripples. With a router, trim the excess laminate covering. Welcome to your new kitchen!
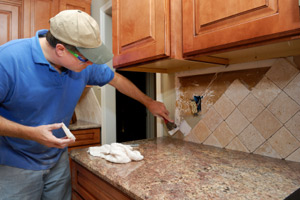
2. Granite/Tile Do It Yourself Countertops: The great aspect of granite/tile countertops is that they can be installed directly over old countertop. It is suggested to roughen up the old surface to allow the adhesive to bond easily. Alternatively, if it is a raw beginning with installing a granite/tile countertop it should be noted that a slip-sheet should be used. This allows for the extension and tightening of the individual tiles. Use a thin set epoxy or tile adhesive to secure the granite/tiles to the slip-sheet surface. It is important to ensure at least a 1/16th or 1/32nd inch spacer between each individual tile to create an even and well-spaced finished surface. The gaps can then be filled in with tile grout that has an adhesive property. Once the do it yourself countertop has been installed and has allowed sufficient time for drying, it should be sealed with a stone sealer.
As one can see, it really is not that difficult to give any kitchen a refreshing change with little or no difficulty. Given the proper set of knowledge and tools, a beautiful transformed kitchen is not only a possibility; it is a reality.