
Tips & Maintenance
Tips on Tiling Over Your Formica Countertop
 Installing tile over your Formica countertop is not rocket science – actually, tiling a Formica countertop is a simpler job than tiling over other countertop surfaces. However, doing this is not a quick job as it requires careful planning, precision and patience. By tiling your Formica countertop, you can change the way your whole kitchen space looks.
Also, you can continue by adding brand new faucets and a vividly-colored wall paint in order to provide your kitchen space with a new look without having to spend a fortune. The main things you are going to need for this job are: a tape measure, pencil, butcher paper, trowel, thinset, grinder/sandpaper, mud pan, tile cutter, tiles, waterproof fabric membrane, water, sealer, soft rags and a tile cleaner.
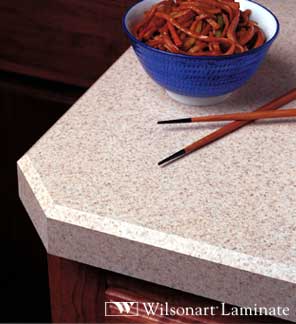
Formica Countertop by Wilsonart Laminate
- First, you will have to measure your Formica countertop and cut the necessary paper template out of your butcher paper. Keep in mind that you will need all these measurement when you purchase the necessary tiles. Next, you will have to check and see whether your Formica countertop laminate can bond tightly enough to the whole surface. Also, you will have to check whether this whole area is structurally sound. Keep in mind that you really need to have a very good base when planning to tile right over your Formica countertop.
- Once you detect a problem – spots or loose laminate, you will have to re-glue it and have it clamped down instead of tearing off your entire Formica surface. Next, you will have to rough up your Formica countertop with the sandpaper in order for the thinset to stick to it. Once you see that the whole surface is scarred enough, you will have to continue by waterproofing the entire Formica countertop.
- Cutting a piece from the waterproof fabric membrane is what comes next – make sure that this piece has the same size as your Formica counter. Also, you may need to overlap all the edges in order to prevent any water leak. By doing this, you will prevent water from penetrating all the wood underneath – in case this happens, your Formica counter may buckle. Make sure that you are using a high quality thinset that is designed for higher performance.
- Next, you will have to spread the thinset in an even manner. Lay on the membrane and smooth out all the bubbles that may appear. Overlap this membrane at its edges. Next, you will have to allow your Formica counter to dry overnight and while you are waiting, you should lay out all the tiles on your template. By doing this, you will get the chance to arrange all the necessary tiles and even cut any of them that need extra trimming. You must not forget to leave all the necessary space between the tiles for grout. Apply the thinset to this membrane and lay out the wanted design.
- Next, you will have to attach a temporary board in order to hold all the tiles right on the side of your Formica countertop. The backs must be buttered with the thinset in order to have them placed on the sides. Also, the ledge will hold all the tiles in the right places until he whole thinset dries. Next, you will have to wipe any excess thinset off but you must be careful not to disturb the tiles. They must be let to dry overnight.
- Next, you will have to clean all the tops and apply the tile sealer. Allow this sealer to dry in order to apply the grout. Remember that this sealer will allow you to have your tiles cleaned easier. Next, you will have to clean all the faces of the tiles and wait 1 week until you can apply 2 coats of tile sealer to the entire surface of your Formica countertop.